


As I promised before that I would write out a tutorial as an easy approach to working with Raspberry and all stuff over it, I’m now realizing that promise.
After 3 days being stuck with numerous problems of installing hardware and software for our Raspberry Pi (RPi), I was sort of successful in establishing the tiny computer from Zero to OpenCV. The purpose of this tutorial is to make a simple RPi’s usage documentation least for myself in order to become a basic knowledge for our further work and study. On the other hand, hopefully it also can help you who are springing some RPis, so that in the future you do have to be messed up with the annoying issues as I have been through.
The tutorial is based on my own experience and some stuff that you can find exactly on internet (don’t worry, I will place the sources as warranty), it contains 3 independent sections, each has its own importance, but you can skip anyone to focus what you really need in time so it can make your progress go fast. Anyway, it’s always my suggestion that it’s the best if you go through all over 3 sections, so you will have a good, strong overview of RPi. So let’s start now.
SECTION 1 – RPi’s INTRODUCTION
All appropriate information about RPis you can find on its official website http://www.raspberrypi.org, I suggest, and you can also find some standard information on Wikipedia as well. Here I list several characters of the RPi model B that we are using:
Here how the RPi model B looks like:
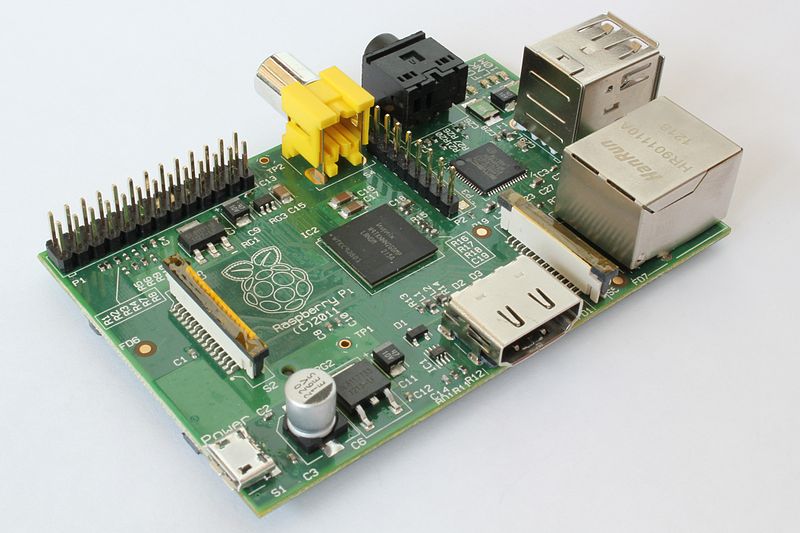 Fig.1. Raspberry Model B.
And its structure:
 Fig..2. RPi model B ‘s Structure Scheme.
Some things to say about RPi model B:
– It’s a credit-card-sized single-board computer developed in the UK, simply called a “tiny” computer.
– Operating system: Linux-like.
– Power: 3.5 W. Recommended input voltage: 5V
– CPU (chip): ARM1176JZF-S 700MHz.
– Storage Capacity: SD card slot. More than 4GB SD card recommended.
– Memory (RAM): 512 MB.
– One of things about RPi I like the most is that it supports GPIO (General purpose Input/Output) pins so that we’re able to connect RPi to external devices such as micro controllers or PLC. In further work we will make connection between RPi and an Arduino board.
 Fig.3. RPi’s GPIO scheme.
The section 1 ended.
…To be continued...
